Wednesday, July 11, 2012

2013 Stampin Up Catalog and Stampin Wheels

The new 2013 Stampin Up catalog is out. In case you have not yet seen it, it is packed full of new stamps, inks, punches, papers, and ideas. The new 2013 colors are awesome, by the way, but I wanted to talk to you about our old friend the Stampin wheel. Remember them? This year they are front and center and better than ever. They are featured on page 6 of the 2013 catalog and throughout there are many new Stampin wheels in the standard, jumbo and builder size. You can use them with an ink cartridge. Stampin Up has pre-inked black cartridges in both the standard and jumbo size. You can purchase an uninked cartridge and fill it with any ink you choose. Have you checked out the new stamp pads? They are new this year. They have a spongy stamp pad surface that really gives you maximum ink coverage on everything you need a stamp pad for. They work great! Some of my favorite new wheels are the Take a Ticket Jumbo wheel and the pennant and awning builder wheels. Don’t forget to get your Stampin around builder wheel spindle and spacer. You can use this to build up to 3 builder wheels together. The spindle fits the jumbo sized Stampin Wheel handle.


Monday, July 9, 2012

Scrapping with Beth hosts scrapbook overnighter


Recently Scrappin with Beth hosted an overnighter for avid scrapbookers.  We gathered at the Dolley Madison house in beautiful Brewster, Ohio.  The Dolley Madison House is a Bed and Breakfast that offers the ambiance of a southern-style great room with contemporary colonial influences.  We dined surrounded by a white picket fence in the Trellis Dining Room.  We slept in 9 suites decorated in historic colors with folk art inspired furnishings.  However, there was not much time for eating or sleeping.  We were greeted by tables decorated with brightly colored favors and gifts provided by Scrappin with Beth.  There was a whole room devoted to make and takes that were also generously provided by Scrappin with  Beth.  In addition, there was a whole table filled with every size and shape of Stampin Up punches and Stamps that we could use for making our scrapbook pages.  All night we munched on hot horderves and a whole table full of candy, cookies, and snacks of all kinds.  We left the following evening with many completed scrapbook pages and a great sense of accomplishment!

Saturday, March 12, 2011

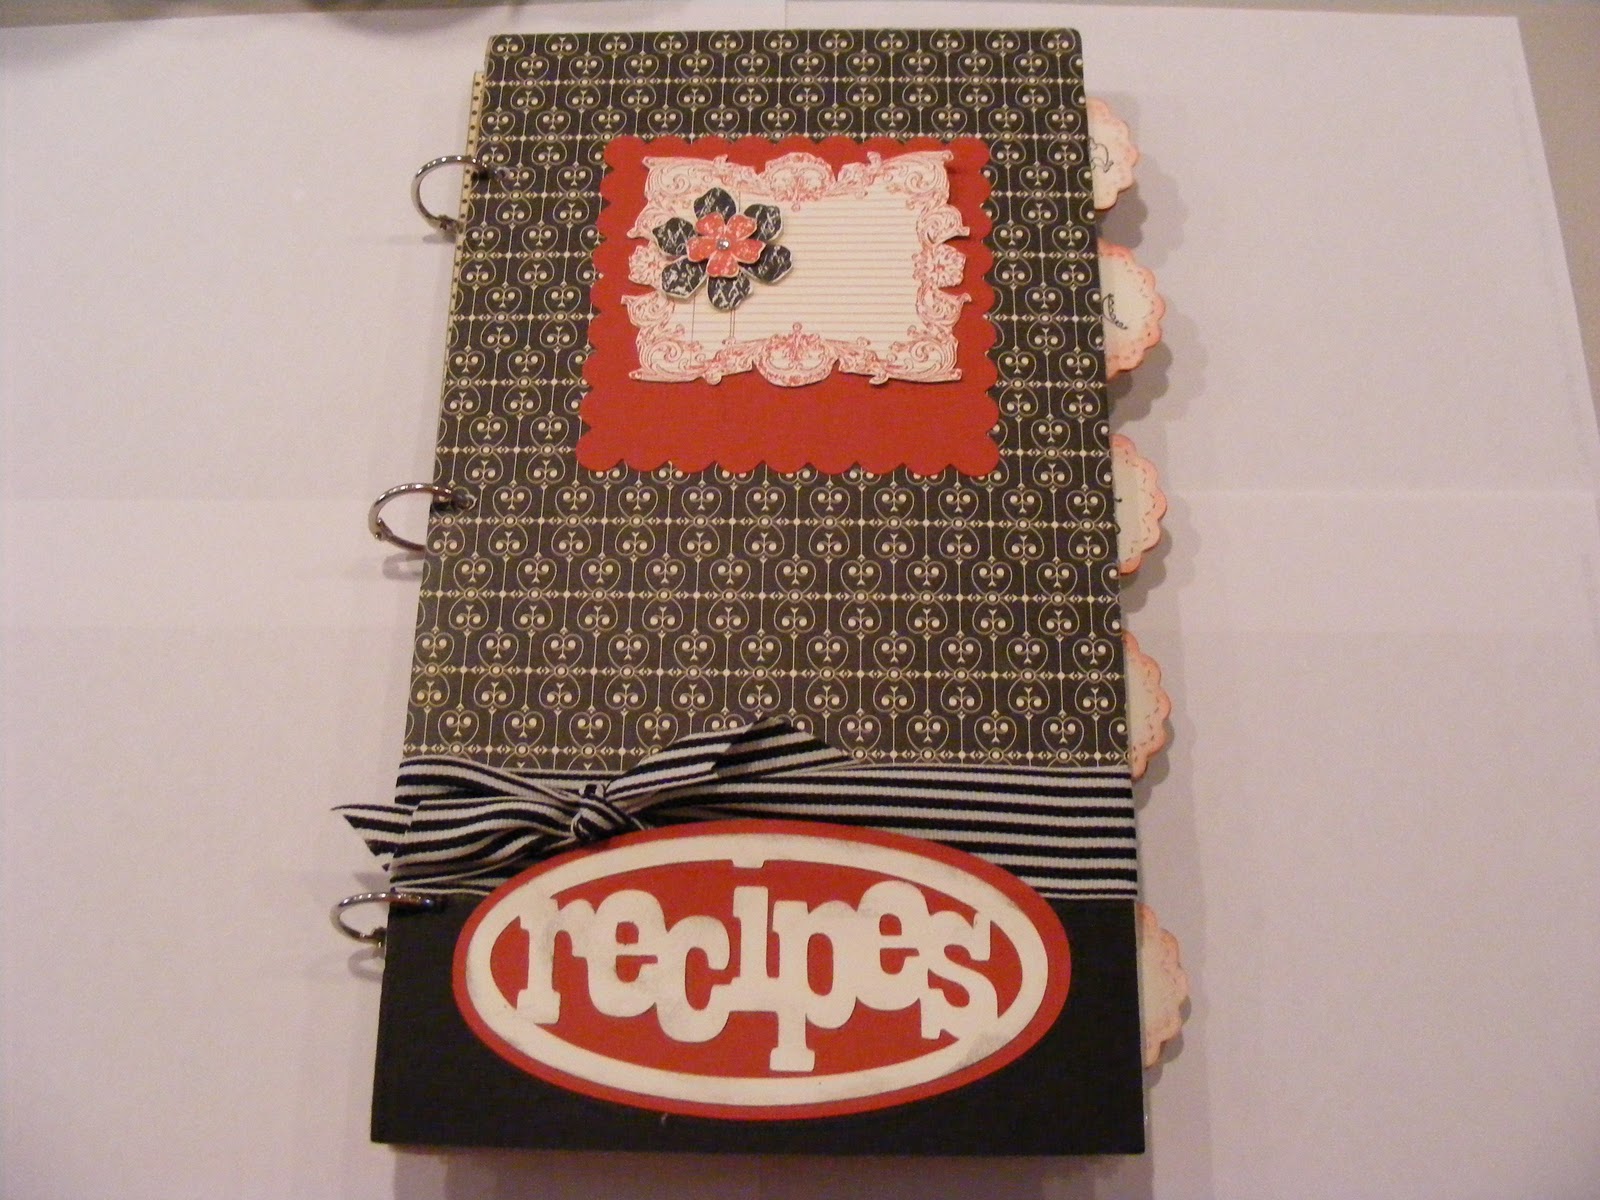
Recipe Book Class

Recipe Book Class

Choose Your Date

Saturday-April 9...8AM-12Noon,

Tuesday-April 12…….9AM-12Noon

Or

Wednesday-April 13….6-9 PM


The size of the Book is 7 X 13


It’s optional to personalize with photos
You will hand stamp 30 recipe cards.

It’s optional to purchase recipe stamp set 
To add Recipe cards as needed.
From The Kitchen Of Stamp Set - by Stampin' Up!

5 Index Tabs
Pre-cut paper
Pre-made embellishments

Personalize with your own notes.


Great Bridal Shower or Mothers Day gift

Required to furnish your own glue and adhesive

Cost Stamp Club Members $25.00
Non-Members $28.00
Reservations and Payment need to be made by
March 3
Contact me at
Stampin Up Representative

Friday, February 25, 2011

Top Note Favor Treat

This sweet little favor goes together very quickly, You can change the colors and Stamps to suit your occasion.

 In this photo the products used are: 
  1.  Daffodil Delight from the Brights collection of the Patterns Designer Series Paper Stack,  
  2.  Whisper White Card Stock
  3.  5/8" Gross Grain Turquoise Ribbon (not a stampin-up product)


The Tools used
  1. Ever After Stamp Set (retired)


Step By Step Directions

1. Use the Top Note Die cut and the Big Shot along with the Daffodil Delight designer series paper to cut out the top note shape.

2. Score the Top Note Shape in the center to fold it over.

3.With the Stamp of your choice stamp a design or sentiment inside the top half of the Top Note shape


4.  Using the L Rubber Stamp and the Basic Black ink pad , stamp your image onto the Whisper White Card Stock.

5. Using the Curly Label Extra-Large Punch, punch out your shape.


6.Punch out the shape using the Tempting Turquoise Card Stock and the Decorative Extra Large Punch and layer as shown with pearls on top one on each side.


7. With 2 dimensionals one on each side attach it to the Top Note leaving room for the ribbon to slide underneath between the dimensionals.


8.  Cut the ends of your  5/8" turquoise ribbon to resemble the ends of a Banner, Slide the ribbon under the raised shapes on top of the Top Note Die Cut.

9. Using a Glue Dot attach a Ghirardelli Chocolate to the inside of the die cut bring the two ribbons together
 at the bottom and tie a small bow to secure them with the 1/8" whisper white taffeta ribbon

.

Enjoy


Thursday, January 6, 2011

January's Stamp Club Meeting

Who's Ready for Spring?

Christmas is over and so I'm feeling like its safe to say that many of us are ready for spring already......Not that we are going to see it this soon but we can still imagine how nice it would be to see warm weather this quickly after Christmas.


In order to help promote the feeling of Spring ,


At our January Stamp Club meeting we created these colorful little baskets using the Stampin'Up Box#2 die-cut 


Shari Price holding her basket she made.

Saturday, January 1, 2011

HAPPY NEW YEAR!!!!

Here at my house we brought the New Year in with a Bang and hours of fun scrapbooking and celebrating all the new things to be created in the coming year.

There were only three of us here, but we had  many laughs and some productive hours.

Below are some photos of the two projects that I completed as the old year passed and the New Began.

Project #1


This is a double 12x12 layout  that I created with the photos I had taken back in October as my husband and I  visited a beautiful spot in northern Ohio. BrandyWine Falls is a great place to spend the day Exploring Nature, The time we spent there was actually very short and fullfilling in taking in a good look at all the beauty God has put here for us to enjoy. If you have the opportunity and love nature I suggest you check the place out and see for yourself.


Project #2

This next project I created for a Birthday gift for a  special little guy in my life.

My middle Grandson will be 7 Years old already in February 2011, He is growing up so fast, and such a blessing in my life.

I wanted to make him something from my heart that he could treasure and also put his treasures in so I made him this little briefcase shaped  box to keep his very own private special things in.

But SSSSHHHH don't tell him you saw it until after his Birthday!!!


This is a photo showing the back and side of the box Below are photos of the front and top of the box.


I think that he will enjoy this  little box as much as I enjoyed making it for him

Next is to find him a  couple special treasures to  place inside.
I am looking forward to all the New Year has to bring...

How Bout You????
HAPPY NEW YEAR!